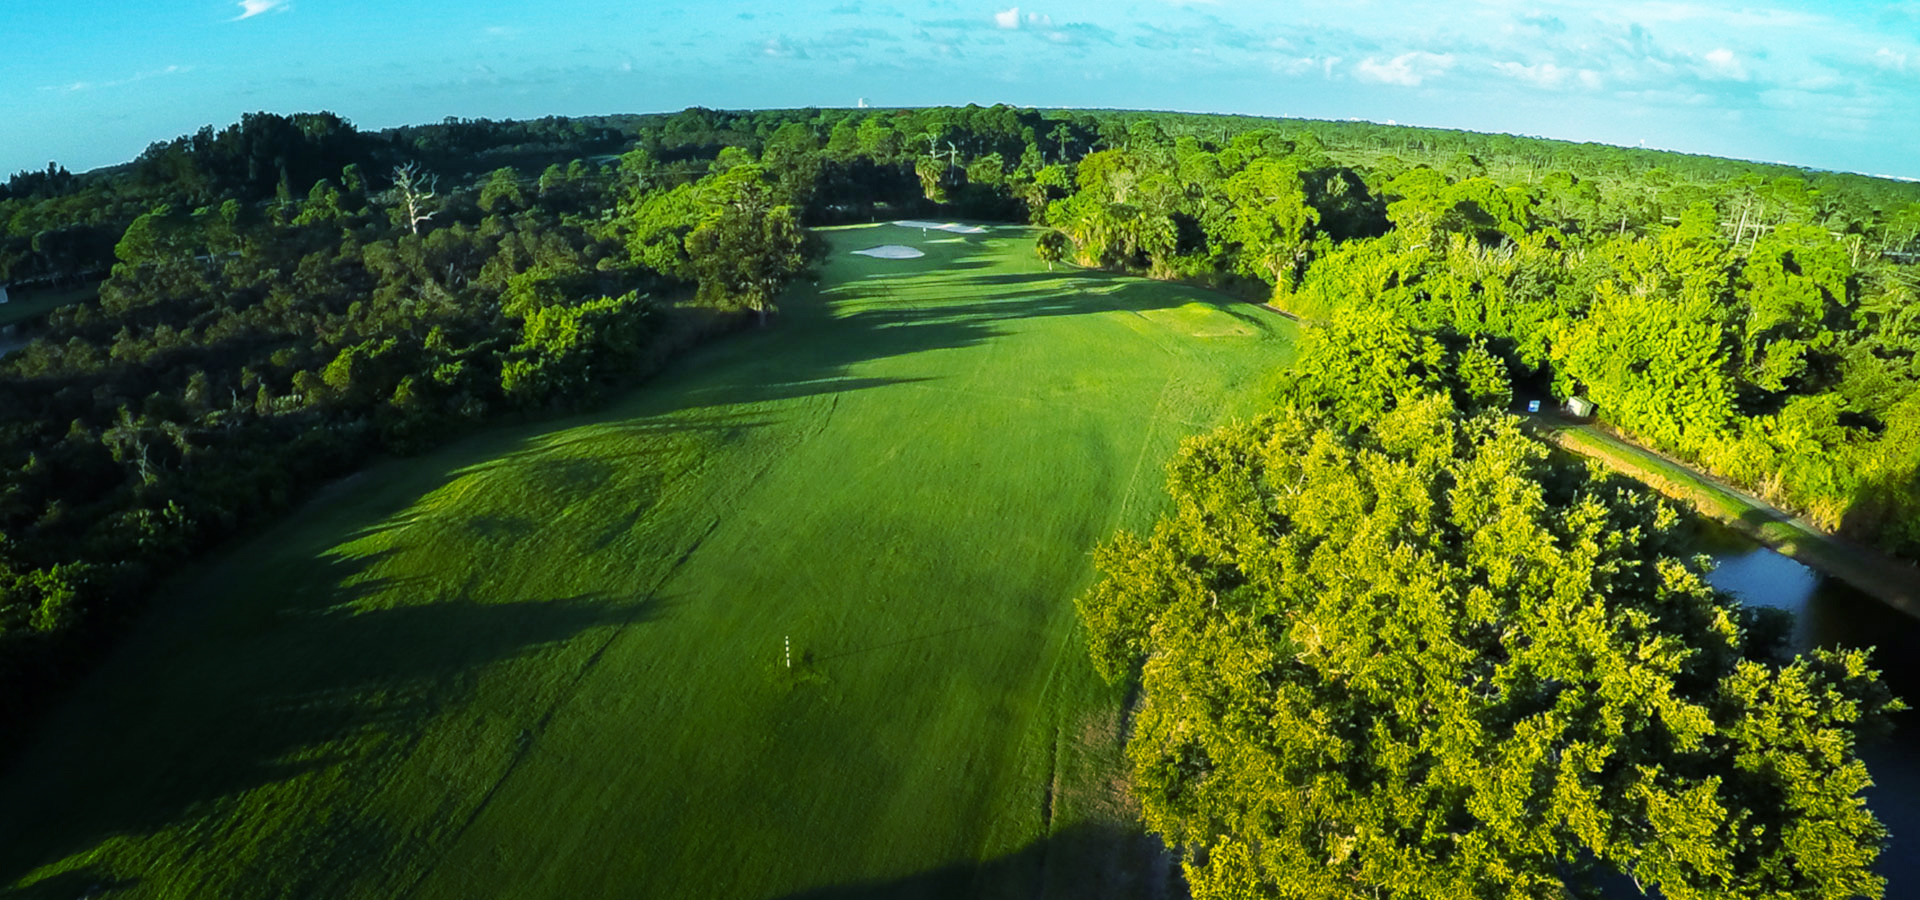
Designed by award winning architect Gordon Lewis in 1989, the Space Coast Golf Club presents exciting challenges and opportunities for golfers at all levels. Lewis’s course designs are known for challenging shot-making opportunities, while being fun to play, with chances to recover from a poor shot. The back tees are demanding even for the best of the best, while the new forward “family/executive tees” provide a memorable golfing experience for all skill levels and those looking for a faster game out on the course.
The course boasts several unforgettable holes, such as the 525-yard, par 5 Signature 7th, regarded as one of the toughest holes in Central Florida. Our players also rave about Hole 4 (390-yard par 4), Hole 11 (407-yard par 4), and Hole 18 (402-yard par 4). The playing characteristics of the course incorporate strategy and finesse that golfers can appreciate.
Space Coast Golf Club continues to serve the Space Coast with something for every golfer. We welcome you to come see for yourself!
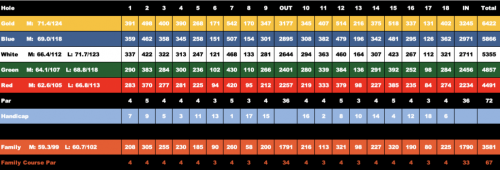
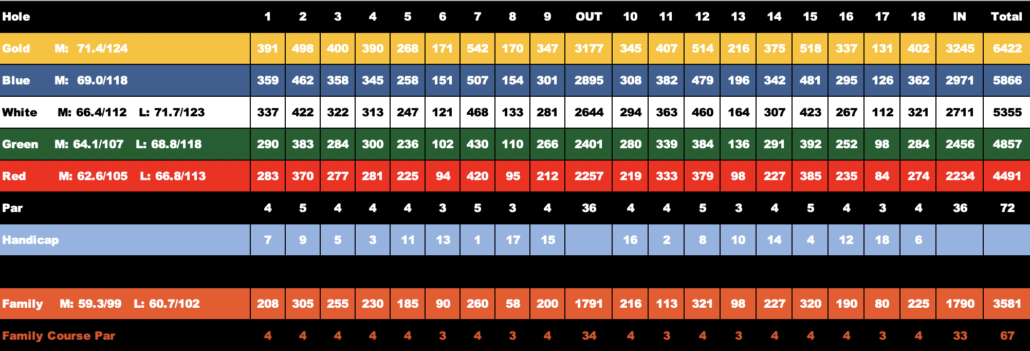
Score Card
New - Family Executive Tees
Space Coast Golf Club is all about growing the game of golf and adding a fun factor here on the Spacecoast. That is why the Club has recently added a Family Tees/Executive Course. At 3,581 yards and Par 67, it’s a “course within a course,” with young players and adult beginners in mind. But that’s not all, we’ve kept plenty of Par 4’s to challenge our regular golfers when they are looking for a faster game out on the course.
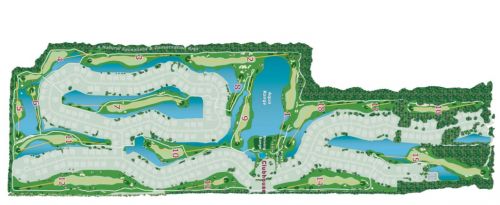
Course Map
Course Tour
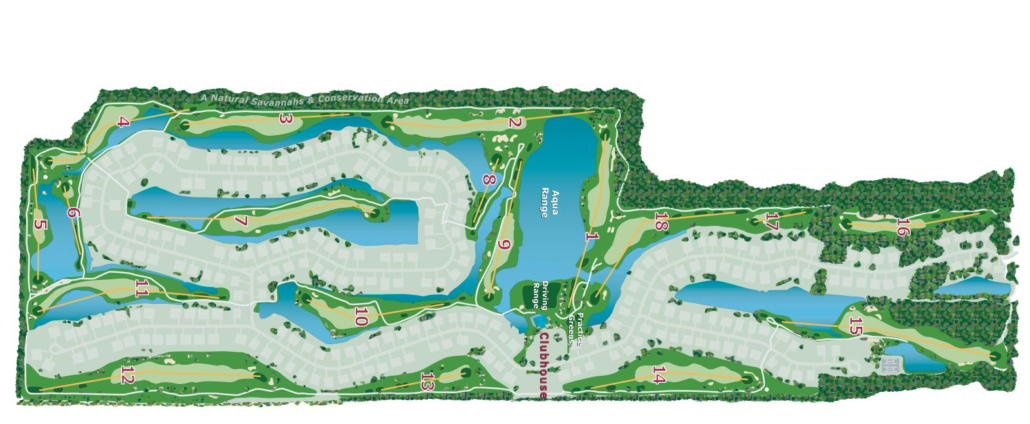
The Space Coast Golf Club on Merritt Island is a 6,450 yard scenic par 72 that can be enjoyed by anyone. We have one of Cocoa Beach’s most unique and memorable golf courses. Use this handy course layout to plan your strategy today.
A hole by hole walkthrough will have you prepared to take an expedition to The Savannahs. Click on any of the hole numbers below for a detailed Hole by Hole description. Watch out for what waits on hole #7!
-
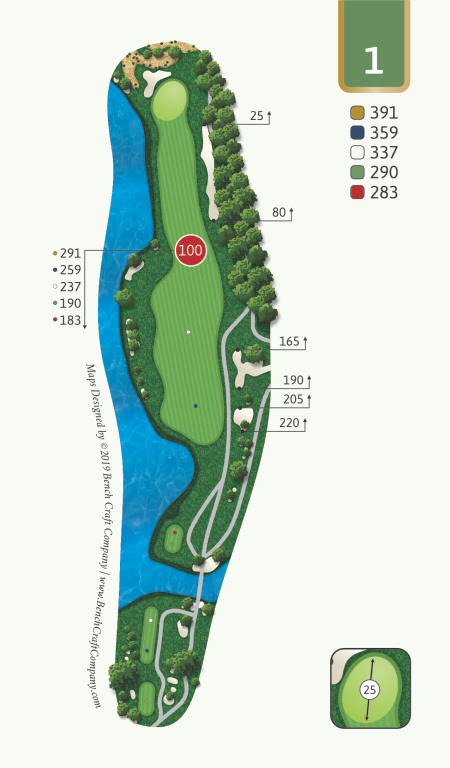
Hole #1
Par 4 Handicap 7
A great opening par 4 to start your round, the opening tee shot forces a carry over water to a straight, forgiving fairway. Keep your tee shot down the middle, as water guards missing this fairway left and woods guard against missing right. Your approach shot will be to a slightly elevated small green.
-
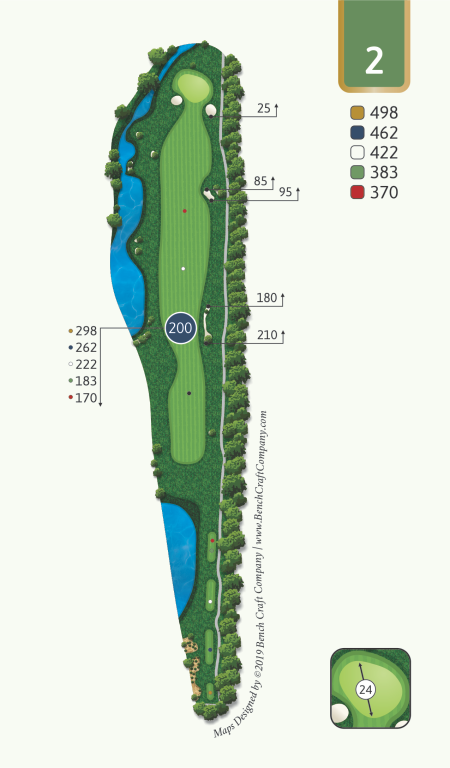
Hole #2
Par 5 Handicap 9
A more open par 5 with water on the left side of the hole and woods guarding the right side. Bunkers protect the right and left sides of this elevated green. The green slopes back left down to bottom right.
-
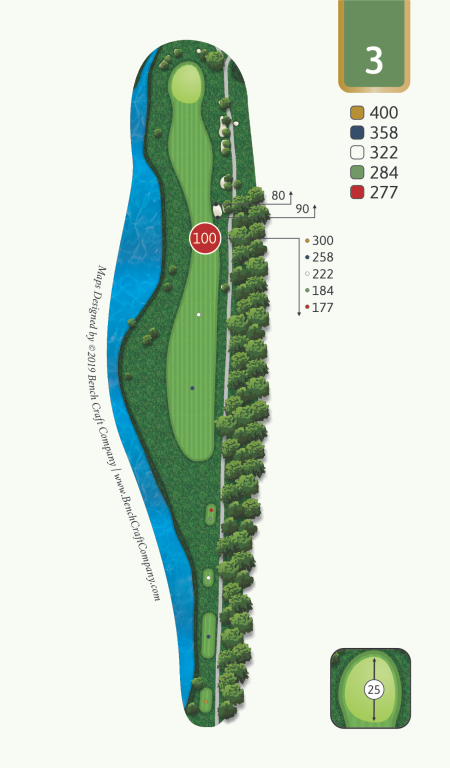
Hole #3
Par 4 Handicap 5
This par 4 looks easy, but the narrow landing area and palms at the 150 yard mark required an accurate tee shot favoring the right side. The green slopes away from you from the center to back.
-

Hole #4
Par 4 Handicap 5
This hole will get your attention. #4 is a 390 yard “S” shaped double dogleg that requires an accurate shot over water ideally to the 150 post. If you hit an aggressive tee shot and the ball ends up left of the 150 stake, you have a much shorter approach shot to the forgiving green. Your 2nd shot is over a conservation area that hides the green, so it’s worth it to take a look at the pin position and find a target in the horizon to aim at. The green is wide and slopes back left to front.
-
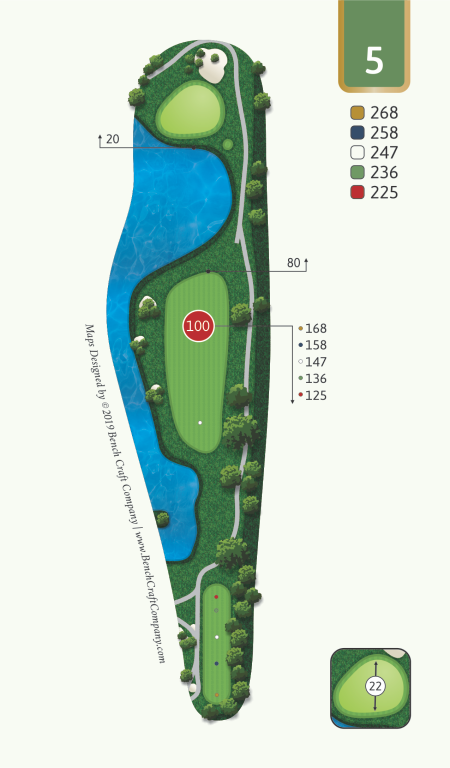
Hole #5
Par 4 Handicap 11
A short par 4 to the most undulated green on the course. Water comes across in front of the green so adjust your tee shot to stay short of trouble. Watch for alligators sunning on the banks of the pond.
-
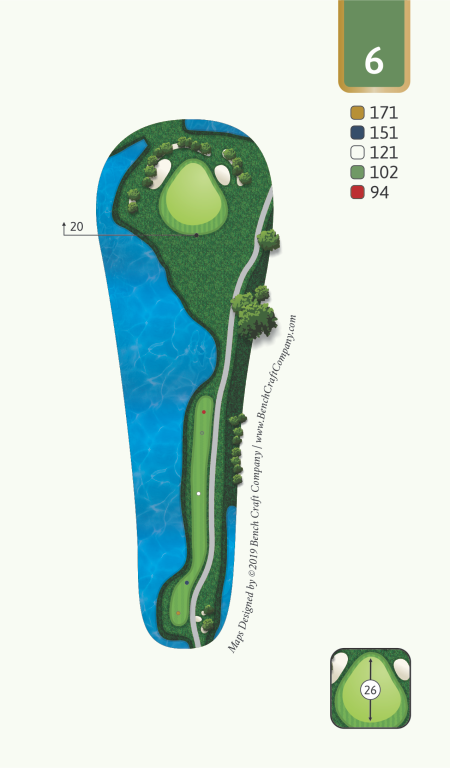
Hole #6
Par 3 Handicap 13
Your first par 3. A solid tee shot over water will reward you with a birdie or par. Avoid the hidden bunker on the left.
-
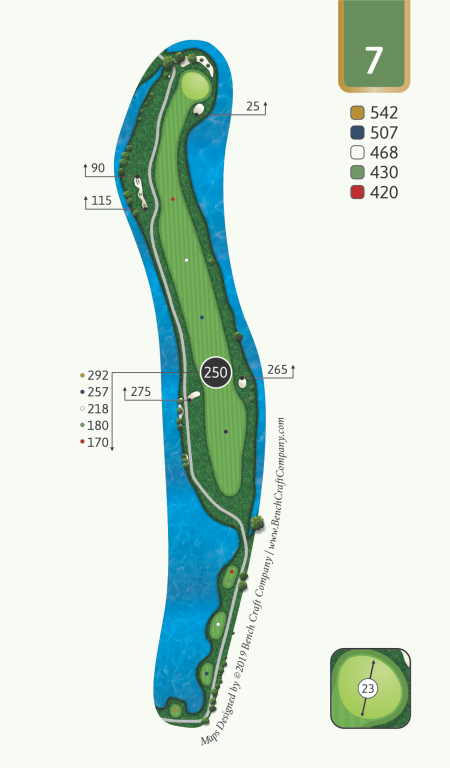
Hole #7
Par 5 Handicap 1
The 525 yard par 5 Signature 7th, which is regarded as one of the toughest holes in Central Florida. From the back tees, a minimum of 220 yard drive is required to reach a 23 yard wide fairway surrounded by water on all sides. Long hitters may consider going for the green in two, which requires a long, accurate shot over water to a protected green surround by water on 3 sides. The safer play is to hit your second shot down the fairway – but an errant shot will find bunkers or water. Finding the small protected green on your 3rd shot is still a challenge. Par is a job well done.
-
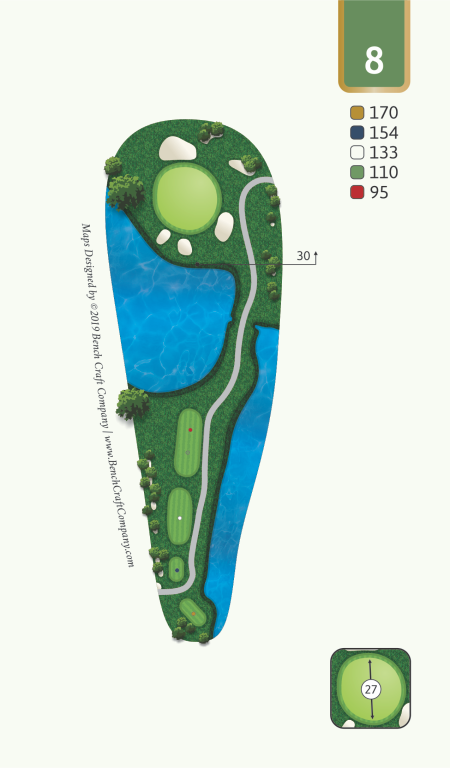
Hole #8
Par 3 Handicap 17
A tricky par 3 over water with twin bunkers protecting the front, back and right sides of the hole. This good sized green slopes away from the middle to the back.
-
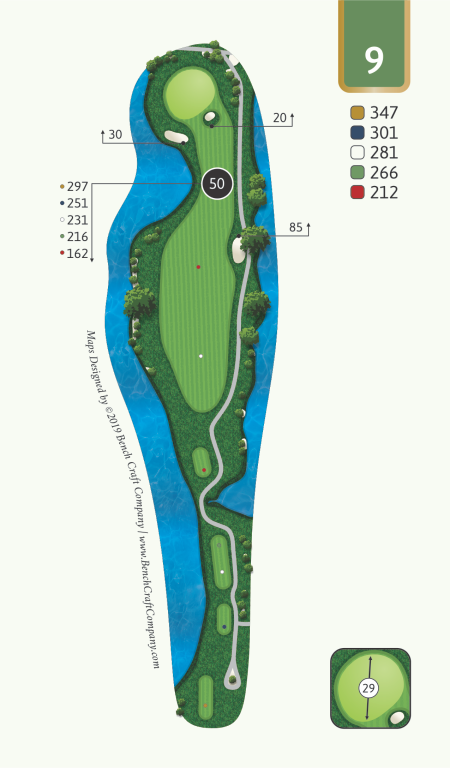
Hole #9
Par 4 Handicap 15
Finish the front with this straightforward par 4 with water guarding the full length of both sides of the generous fairway. The water comes in to play on the left side at about the 80 yard mark. Avoid the bunkers on the left and right front and OB off the back of the green.
-
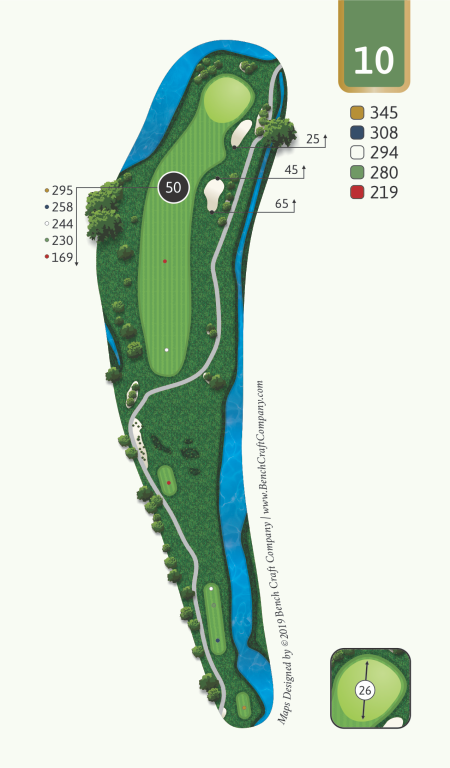
Hole #10
Par 4 Handicap 16
A relaxing back nine starting hole. The fairway is a dogleg right with bunkers guarding the right side of the hole. This is one of the biggest and flattest greens on the course.
-
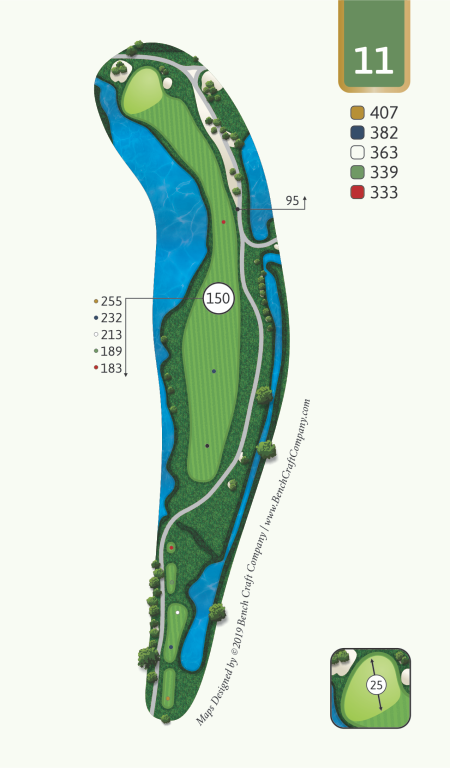
Hole #11
Par 4 Handicap 2
This hole is a test of accuracy and precision. You should hit your tee shot down the right side of the hole to avoid trouble. A tee shot close to the pond leaves a 150 yard approach shot to the middle of this large undulating green. Bunkers right front and back left should not come in to play.
-
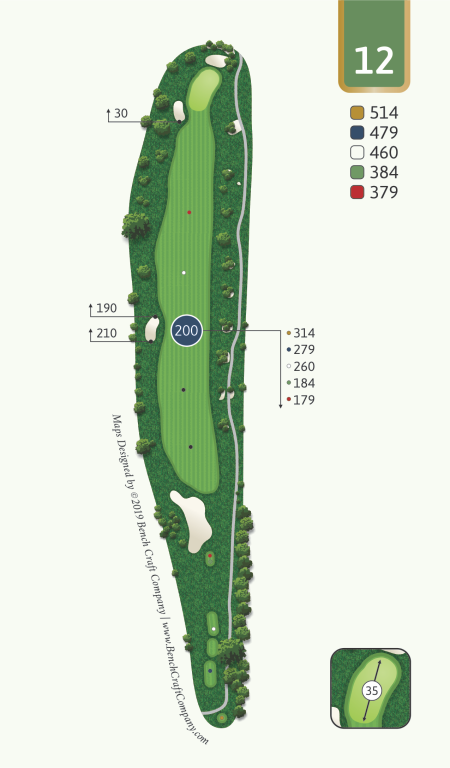
Hole #12
Par 5 Handicap 8
No stress on this wide, straight par 5. Hit away and try to match the double eagle made from the plate in the ground at the 200 yard mark. Greenside bunkers guarding left and behind the hole should not come in to play. Look to the northeast for great rocket launch viewing.
-
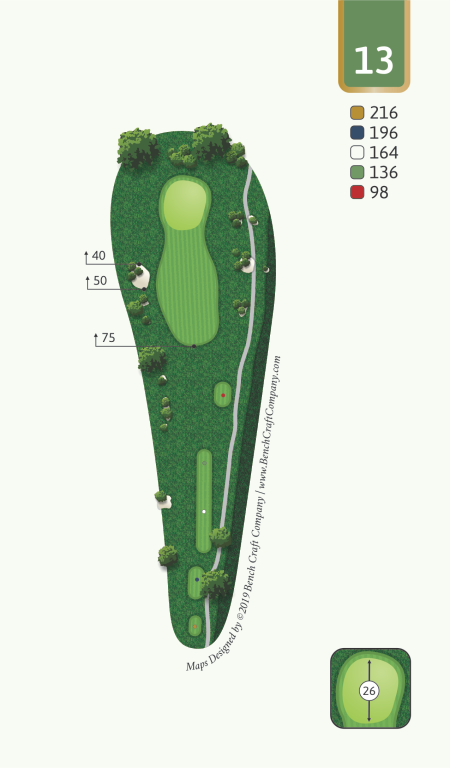
Hole #13
Par 3 Handicap 10
Another testy par 3. The center of the green is the percentage play. The ample green slopes from to right down to near left front.
-
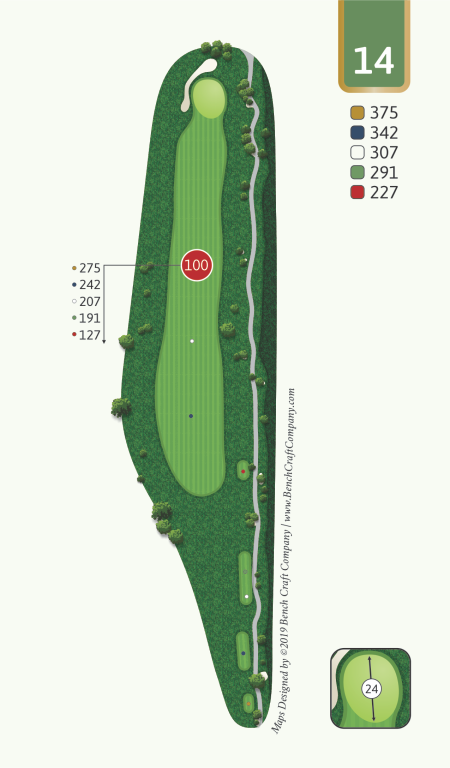
Hole #14
Par 4 Handicap 14
The 14th hole boasts a wide fairway and a large receptive green. There is one bunker that protects the entire left side of the hole.
-
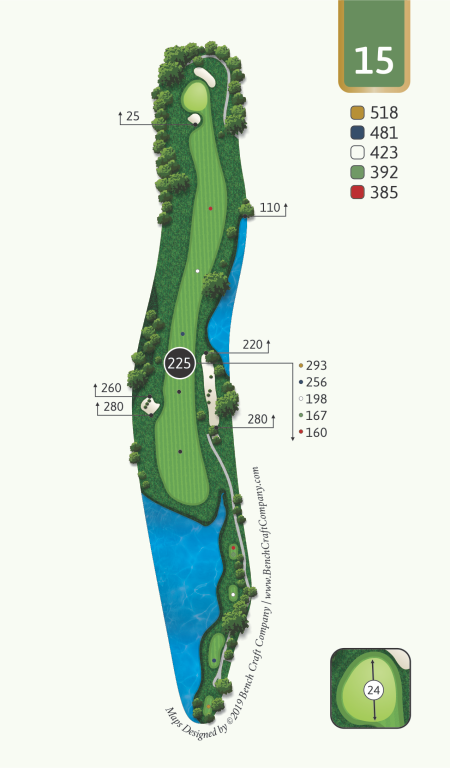
Hole #15
Par 5 Handicap 4
A slight dogleg par 5. Aim for the tall dead tree in the distance directly in line with the tee box. Keep with your second shot down the right side of the fairway, but stay short of the pond on the far right. A deep bunker on the near left guards the green and another on the back right catches long approach shots.
-
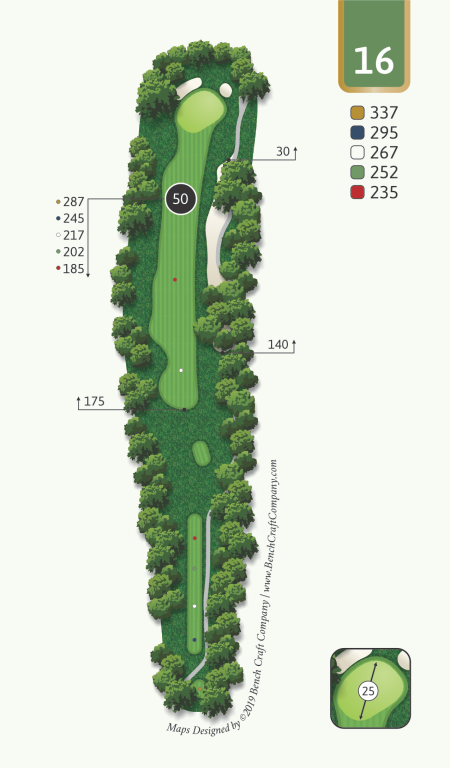
Hole #16
Par 4 Handicap 12
Hole 16 looks like a walk in the park, but a narrow landing zone requires precision off the tee. The green is large with slight undulations, but this is a good opportunity for a birdie.
-
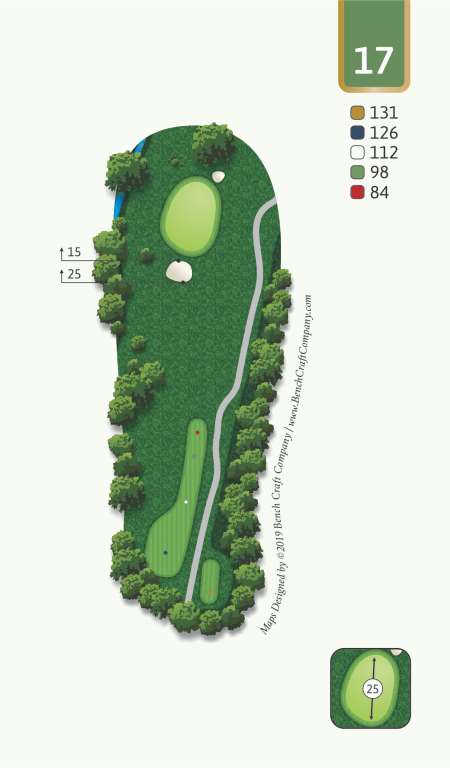
Hole #17
Par 3 Handicap 18
Your last par 3 of the day. Although it is short, it requires an extremely accurate tee shot. Clear the front bunker and hit a high approach shot to hold this small, undulated green.
-
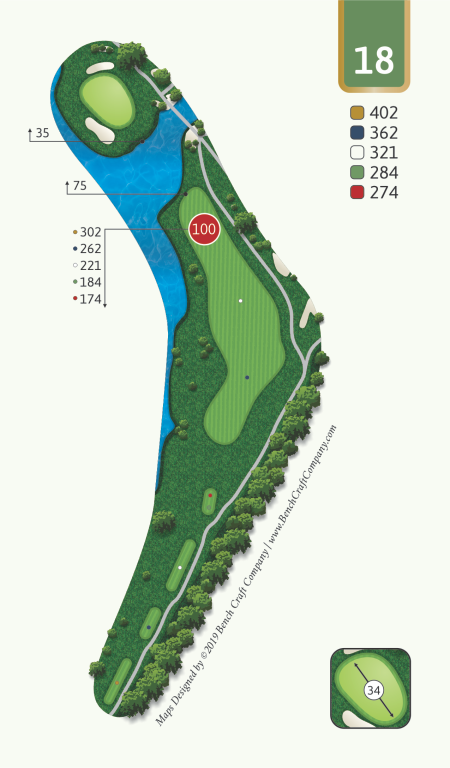
Hole #18
Par 4 Handicap 6
Hole #18 is a tough finishing hole. There is water along the entire left side of the hole and a line of seven palm trees lined up on the right side of the fairway. This 400 yard dogleg left requires a tee shot long enough to clear the corner. The other option is to hit a tee shot to down the right side of the fairway, but this means you will be left with a longer approach shot over water. The green slopes back to front with a lengthy bunker along the entire left side. You will be very happy with a par here.